环境
这里仅说明本文使用的开发环境, 版本不一定非要一致, 但是不知道会不会出现问题
JDK1.8 官网推荐 jdk1.7+(最优1.8)
Android SDK
-
目前用的最新版3.6.3
-
建议使用最新版, 最好同时使用对应版本的HbuilderX
科学上网
想想办法
简介
目的
uni原生插件, 是为了补足uni-app项目的功能, 或者进一步提高APP性能, 基于开源项目weex架构
模式
根据不同需求, uni原生插件可分为两个模式
- Module模式
- 能力扩展,无嵌入窗体的UI控件。大部分插件都是属于此类,比如调用计步器API。代码写法为通过js进行require,然后调用该插件对象的方法。如涉及一些弹出框、全屏ui,也仍然属于Module模式。类似于前端里的js sdk
- Component模式
- 在窗体中内嵌显示某个原生ui组件。比如窗体局部内嵌某个地图厂商的map组件,上下混排其他前端内容,就需要把这个原生地图sdk封装为Componet模式。代码写法与vue组件相同,在template里写组件标签。类似于前端里的vue组件。
注意
- vue页面中仅支持使用Module类型的原生插件,且不支持调用同步方法返回数据
- nvue页面中支持使用Module和Component两种类型的原生插件
本文仅涉及到Module模式
了解官方示例
Android离线sdk
下载
我这里下载的是2.6.16版本, 如果不想使用最新版, 可以在Dcloud提供的网盘下载历史版本
目录
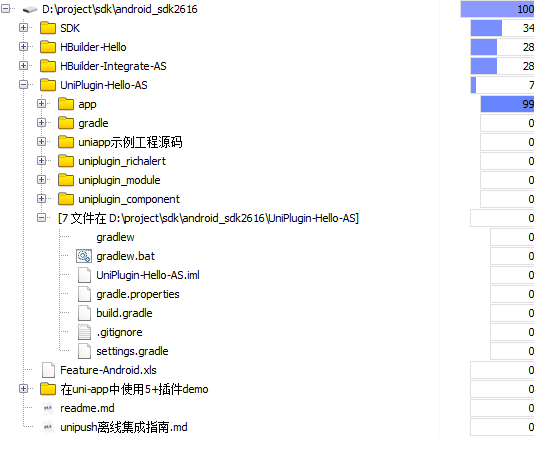
UniPlugin-Hello-AS:
Android Studio环境离线打包带扩展插件演示应用, 本文的主角
SDK:
SDK库文件, 在libs中
HBuilder-Hello:
离线打包演示应用
HBuilder-Integrate-AS:
5+ SDK 集成和插件开发示例
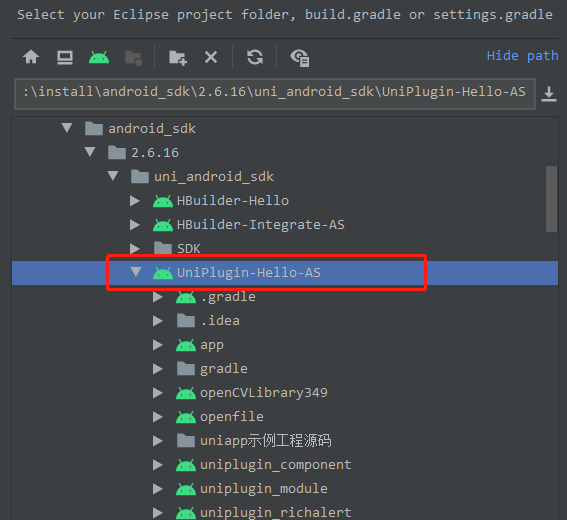
导入
- File->New->Import Project
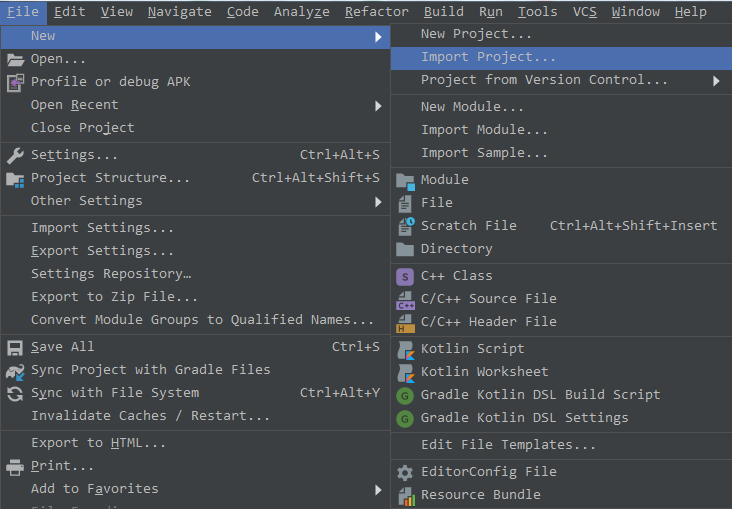
- 找到离线sdk目录, 将UniPlugin-Hello-AS项目导入, 点击ok, 等待build结束
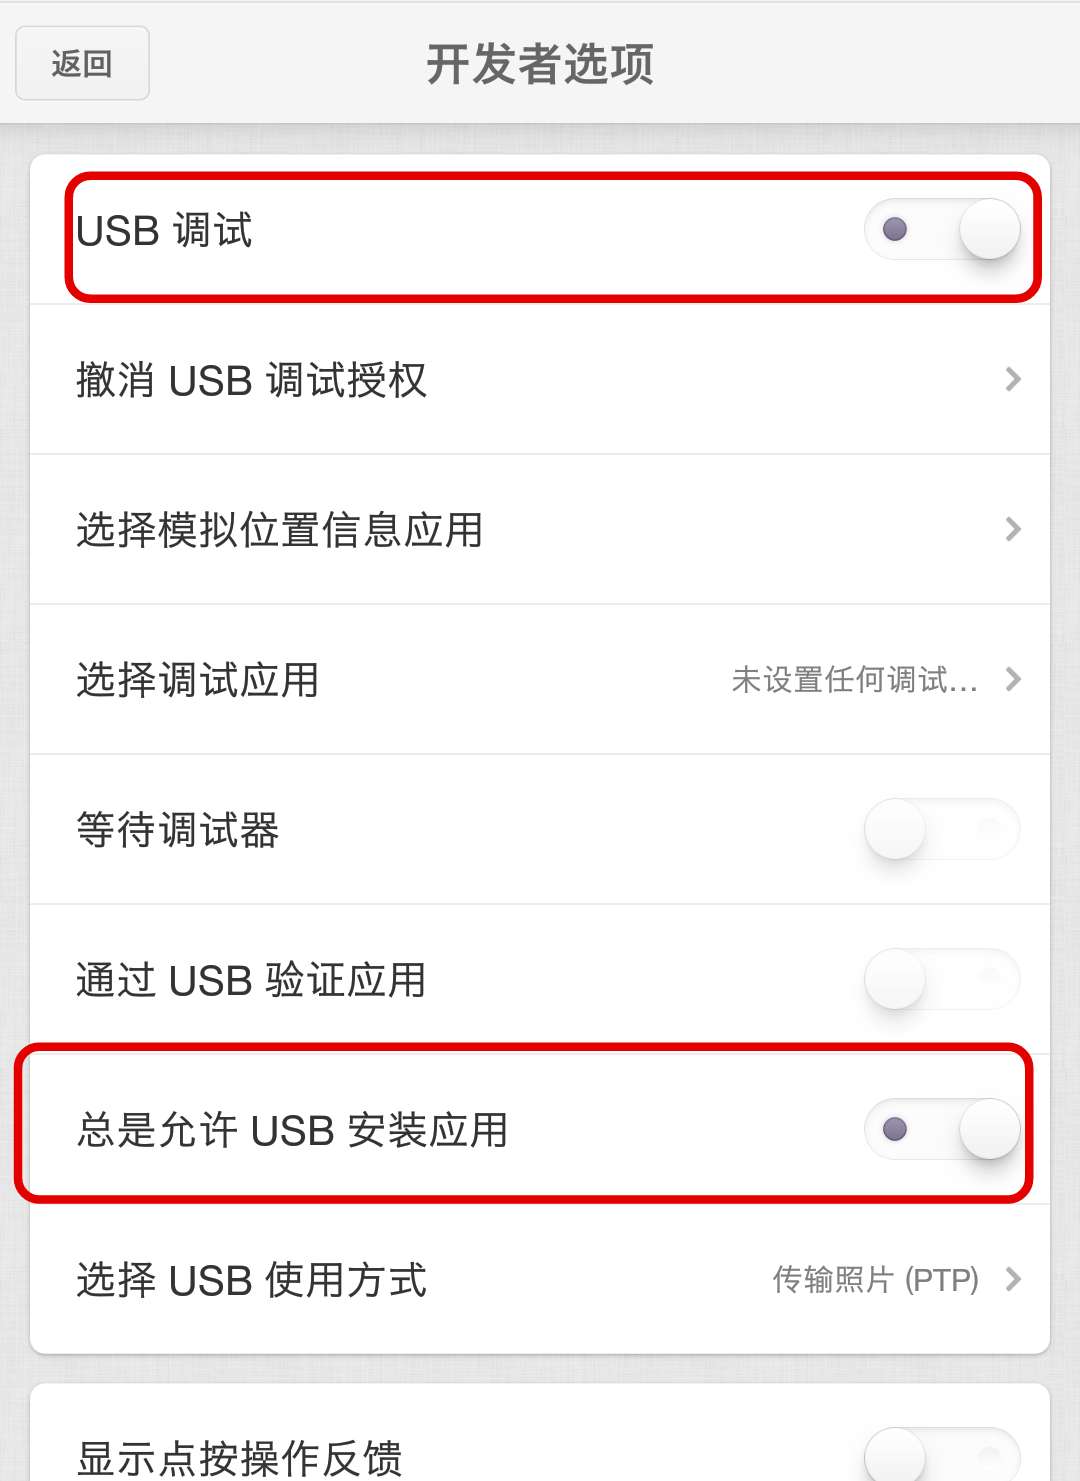
运行示例
- 数据线将手机连接电脑上, 开启开发者选项, 打开USB调试及允许USB安装应用, 请自行google或百度你的机型如何开启, HbuilderX中也有如何真机调试的教程
- Android Studio中将项目运行到真机, 选择app, 及你的手机型号, 点击右侧绿色三角运行

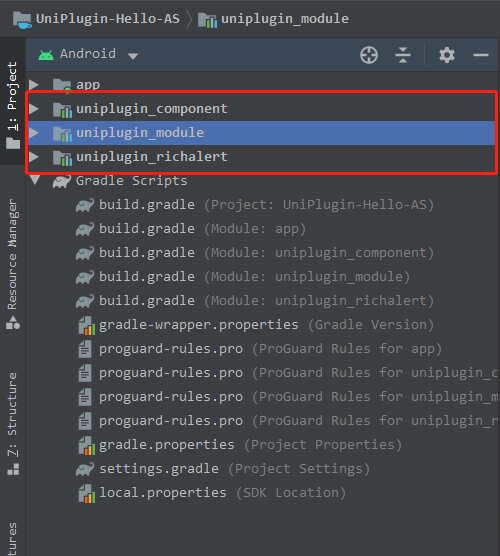
- 运行成功可以在你连接的手机上看到运行起来的app, 有这样三个部分, 分别对应着项目中的三个库, 也可以说是三个插件

生成本地打包资源
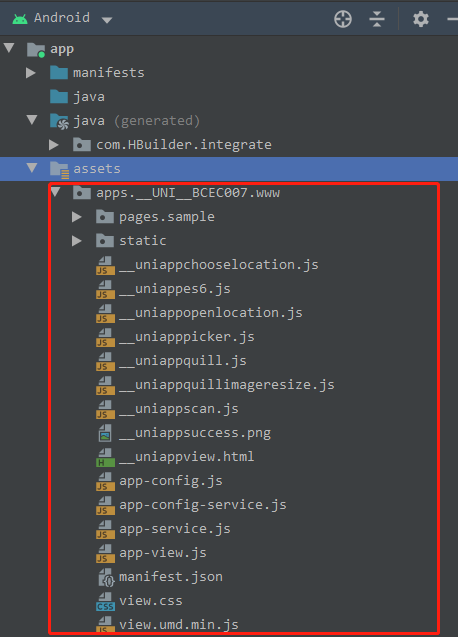
左上角代码视图调整到Android, 依次打开app/assets/apps/__UNI__BCEC007/www目录, 我们看到的是编译后的uni-app项目, 那么要如何编译呢?
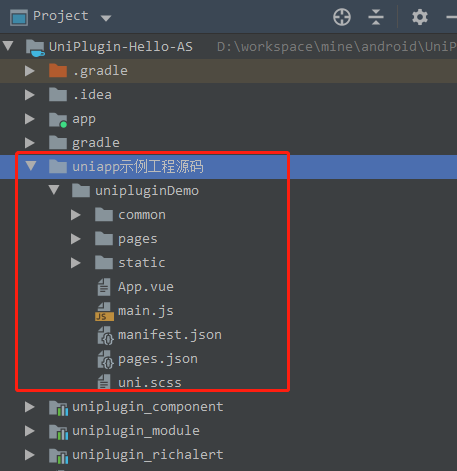
我们将代码视图调整为Project, 看到有个名为uniapp示例工程源码的目录, 展开后看到了我们熟悉的uni-app项目结构
将其unipluginDemo项目使用HbuilderX打开, 打开manifest.json重新获取一下AppID

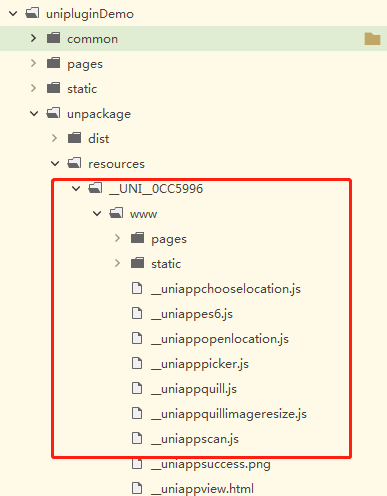
依次点击发行->原生app本地打包, 生成本地打包app资源

等待控制台提示导出成功, 打开unpackage/resources目录可以看到app资源已经生成好了
将以AppID命名的目录复制, 放到上面第1步提到的app/assets/apps目录下, 并修改app/assets/data/dcloud_control.xml中的appid为你自己的appid, 点击运行, 现在运行的就是刚刚编译好的app资源, 原有的__UNI__BCEC007目录可以删掉啦

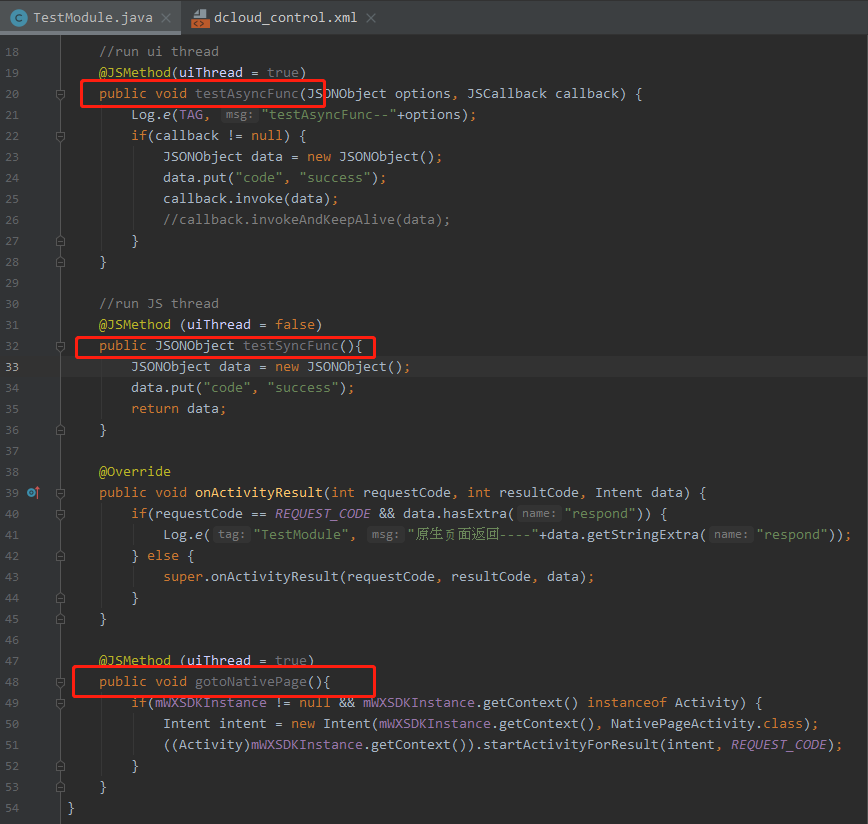
app内的扩展module下的三个按钮的点击事件, 分别调用了uniplugin_module\src\main\java\io\dcloud\uniplugin\TestModule.java内的三个方法
插件开发
前面使用的是官方提供的示例项目及原生插件, 现在需要自己动手开发一个插件
创建插件
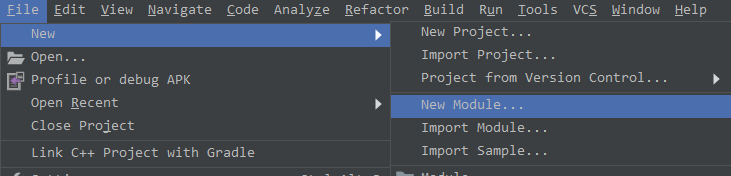
点击Android Studio File->New->New Module
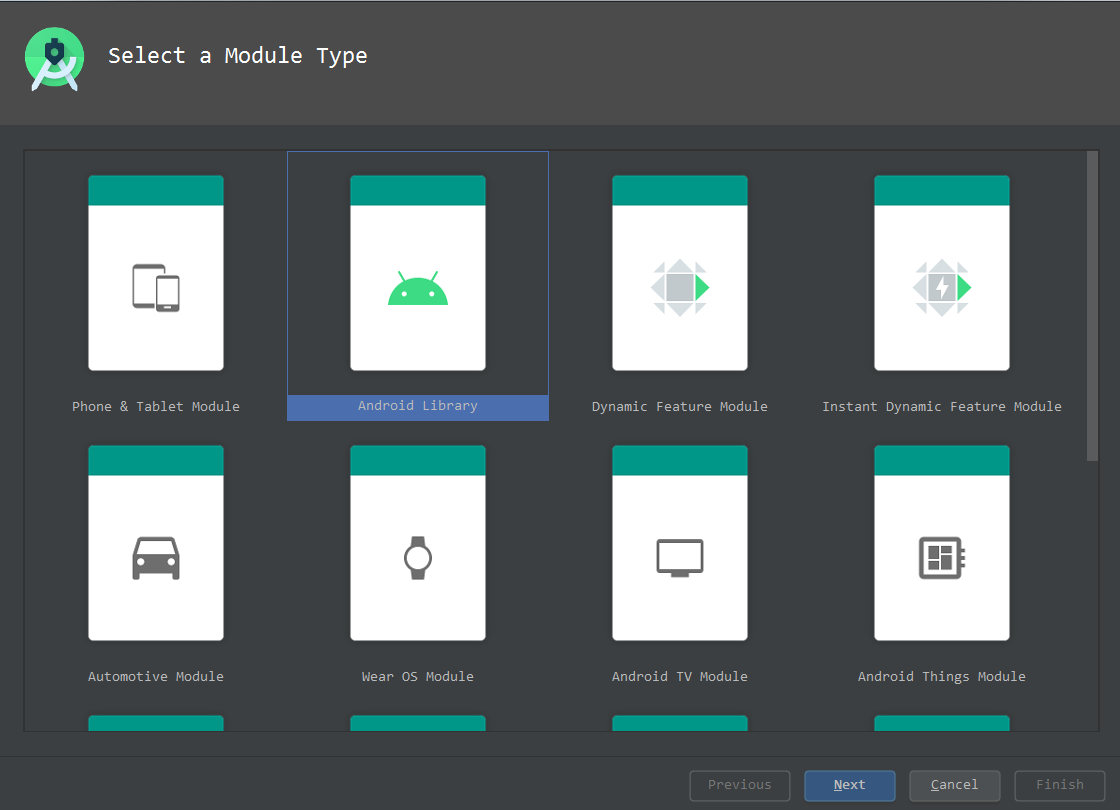
选择Android Library, 点击Next
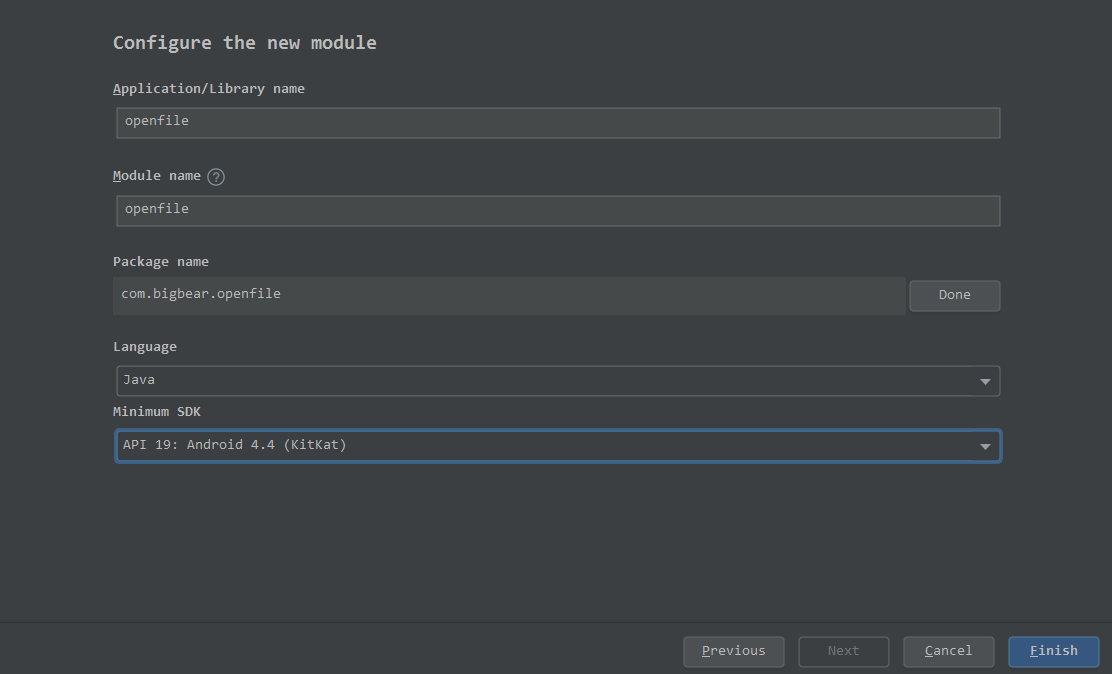
自定义库名, 模块名, 包名, 语言选择Java, Minimum SDK选择API 19, 新手可以和图中保持一致, 避免出错, 点击Finish
等待Build成功, 可以看到左侧项目管理器可以看到创建的插件
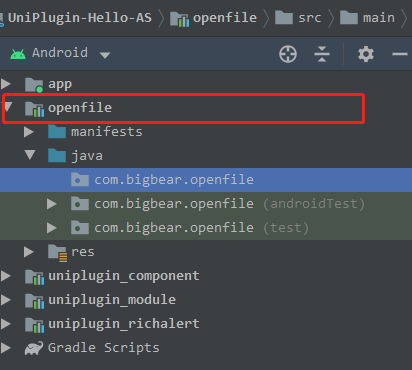
配置文件
打开openfile的build.gradle, 将dependencies节点下内容删除, 替换成下面内容
dependencies {
    implementation fileTree(dir: 'libs', include: ['*.jar'])

    compileOnly 'com.android.support:recyclerview-v7:27.1.0'
    compileOnly 'com.android.support:support-v4:27.1.0'
    compileOnly 'com.android.support:appcompat-v7:27.1.0'
    compileOnly 'com.alibaba:fastjson:1.1.46.android'
    compileOnly fileTree(dir: '../app/libs', include: ['uniapp-release.aar'])
}在dependencies同级添加repositories节点
repositories {
    flatDir {
        dirs 'libs'
    }
}
点击AS右上角Sync Now, 等待同步成功
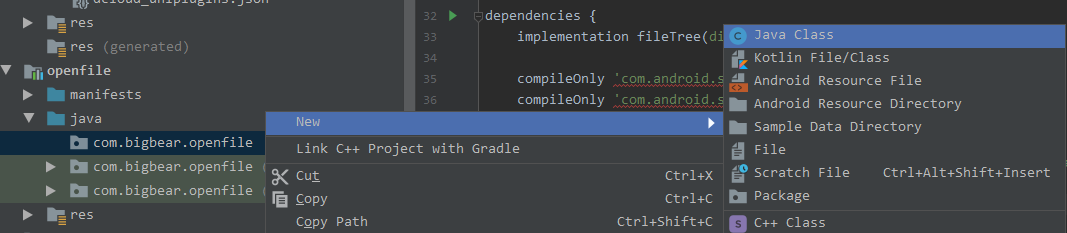
创建Module类
在com.bigbear.openfile下新建Java Class,
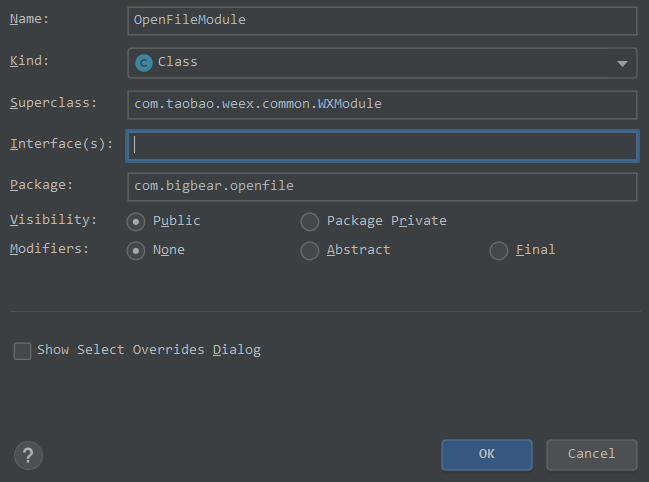
填写类名, 继承WXModule, 点击OK
编写一个init函数, 测试一下能否正常使用. 代码如下:
package com.bigbear.openfile;

import android.util.Log;

import com.alibaba.fastjson.JSONObject;
import com.taobao.weex.annotation.JSMethod;
import com.taobao.weex.bridge.JSCallback;
import com.taobao.weex.common.WXModule;

public class OpenFileModule extends WXModule {
    public static String TAG = "BIGBEAR";

    @JSMethod(uiThread = true)
    public void init(JSONObject options, JSCallback callback) {
        Log.e(TAG, "testinit: " + options);
        if(callback != null) {
            JSONObject data = new JSONObject();
            data.put("code", 0);
            callback.invoke(data);
        }
    }
}
注册插件
打开app/assets/dcloud_uniplugins.json文件, 在nativePlugins节点下新增
{
   "hooksClass": "",
   "plugins": [
     {
       "type": "module",
       "name": "OpenFile",
       "class": "com.bigbear.openfile.OpenFileModule"
     }
   ]
}
原生工程中调用插件方法进行调试
新建一个uni-app项目, 或者使用现有的项目, 在页面中引入插件, 并添加一个按钮触发init方法
<template>
    <view>
        <button type="primary" @click="testInit">testInit</button>
    </view>
</template>

<script>
    // 引入 module
    const OpenFile = uni.requireNativePlugin("OpenFile")
    export default {
        onLoad() {

        },
        methods: {
            testInit() {
                OpenFile.init({a:1, b:2}, res=> { //调用插件中刚编写的init方法
                    console.log(res);
                })
            }
        }
    }
</script>生成本地打包APP资源, 并且将其放入原生工程目录下, 可参考前面说过的步骤完成, 记得保证dcloud_control.xml中的appid和uniapp项目的appid一致
在app的build.gradle中添加插件
implementation project(':openfile')点击RUN 按钮运行app, 点击测试按钮, 可以在logcat中看见我们打印出的传递过来的参数
logcat中的日志很乱, 筛选一下方便查看

openfile功能
这个功能想必大部分人都用过, 就是在使用 微信, QQ打开文件的时候, 我们想使用其他应用打开, 方便我们编辑或查看文档, 那么你会见到这个弹窗

那么, 我们要做的, 就是将你自己开发的uni-app项目, 添加到这个列表中
AndroidManifest.xml
打开openfile下的AndroidManifest.xml文件, 修改成下面的样子
<manifest xmlns:android="http://schemas.android.com/apk/res/android"
    package="com.bigbear.openfile" >

    <application
        android:allowBackup="true"
        android:label="@string/app_name"
        android:supportsRtl="true">
        <activity android:name="com.bigbear.openfile.OpenFileActivity"
            android:theme="@style/Theme.AppCompat.Dialog">
            <intent-filter>
                <action android:name="android.intent.action.VIEW" />
                <action android:name="android.intent.action.MAIN" />
                <action android:name="android.intent.action.SEND"/>

                <category android:name="android.intent.category.LAUNCHER" />
                <category android:name="android.intent.category.DEFAULT" />

                <category android:name="android.intent.category.BROWSABLE" />

                <data android:scheme="http"/>
                <data android:scheme="https"/>


                <data android:scheme="file"/>
                <data android:scheme="content"/>

                <data android:mimeType="text/plain" /> <!--txt-->
                <data android:mimeType="text/xml" />
                <data android:mimeType="text/csv" />

                <data android:mimeType="application/msword" /> <!--doc-->
                <data android:mimeType="application/vnd.openxmlformats-officedocument.wordprocessingml.document" /> <!--docx-->
                <data android:mimeType="application/vnd.ms-powerpoint" /> <!--ppt-->
                <data android:mimeType="application/vnd.openxmlformats-officedocument.presentationml.presentation" /> <!--pptx-->
                <data android:mimeType="application/vnd.ms-excel" /><!--xls-->
                <data android:mimeType="application/vnd.openxmlformats-officedocument.spreadsheetml.sheet" /><!--xlsx-->
                <data android:mimeType="application/json" />
                <data android:mimeType="application/pdf" /> <!--pdf-->
                <data android:mimeType="application/xml" />
                <data android:mimeType="application/vnd.ms-works" /> <!--wps-->

            </intent-filter>

        </activity>
    </application>


</manifest>
OpenFileActivity
在com.bigbear.openfile下新建OpenFileActivity.java, 在onCreate中获取其他应用打开你的应用时传递过来的文件路径, 然后通过scheme唤起你的uni-app应用
package com.bigbear.openfile;

import android.content.Intent;
import android.net.Uri;
import android.os.Bundle;
import android.os.Environment;
import android.support.v7.app.AppCompatActivity;

public class OpenFileActivity extends AppCompatActivity {
    @Override
    protected void onCreate(Bundle savedInstanceState) {
        super.onCreate(savedInstanceState);
        System.out.println("----------*******************************onCreate**************************-------------");
        System.out.println("----------*******************************openfile**************************-------------");

        Intent intent = getIntent();
        Uri uri = intent.getData();
        assert uri != null;
        String path = uri.getPath();
        String _uri;

        if ("content".equals(uri.getScheme()) && path != null ) {
            if (path.startsWith("/external/")) { //wechat
                path = Environment.getExternalStorageDirectory().getAbsolutePath() + path.replace("/external", "");
                _uri = "file://" + path;
            }else if (path.startsWith("/external_files/")) { //qq
                path = path.replace("/external_files", "");
                _uri = "file://" + path;
            }else {
                _uri = uri + "";
            }

        }else  {
            _uri = uri + "";
        }

        System.out.println(_uri);
        Uri open_uri = Uri.parse("abc://"+ _uri); //这里的abc是你给uniapp项目设置的scheme
        Intent _intent = new Intent(Intent.ACTION_VIEW, open_uri);
        startActivity(_intent);

        System.out.println("----------***************************************************");

    }
}
重新运行, 在微信中或者qq中找一个文件, 选择用其他应用打开, 可以看到, 我们的测试app已经出现在了列表中

选择HBuilder-integrate-AS打开, 应用会自动打开跳转到我们在代码中写的scheme的应用中, 同时logcat中看下打印出的内容, 我们也已经获取到了文件的链接